
Project Update: #BatBomber - Working With Styrene
As I have continued work on the BatBomber build, I’ve reached a point where off-the-shelf parts and components will no longer fit the bill and customized pieces need to be created. As I laid out the plans for this themed update, I didn’t have many aftermarket parts earmarked, outside of the driver and the Boom Racing Boomerang Type I and Type E shocks. While the stock panels work well as a base-layer, additional armor panels needed to be handmade.
With scale R/C vehicles, you can choose just about any material you want to craft exterior components, accents and more. Since I wanted to keep this vehicle on the side of being durable and versatile enough to take it out for some “active” driving, I choose styrene as my material of choice for not only the exterior panel additions but also the interior. When compared to Lexan/polycarbonate, which most radio-controlled vehicle bodies are constructed of, styrene tends to be just as durable (with a few exceptions), is easy to form and manipulate, and is lower in cost. I purchased four 12” x 12” panels for under $9 at a .04” thickness. This is almost twice as thick as the stock body panels, giving both a visible sense of durability as well as actual durability.
Cutting Styrene
There are a few ways you can go about working with styrene to get the shapes that you need for your project. The following three methods are the most widely used:
- Scoring - Making repeated, medium-pressure cuts across the surface of the material with a sharp blade and (gently) snapping it along the scored line. This method takes a bit of time to do, but you’ll get very clean edges and precise shapes from taking a bit more time.
- Cutting with a scissors - While this doesn’t give you the same amount of precision as scoring, it can be a bit faster, if you need to quickly knock out some elements for your build.
- Using a Dremel or other handheld, powered cutting tool - This will get the job done the fastest, but you need to make sure you don’t rush your cutting attempts.
90% of my panels and interior pieces were cut out using the scoring method, but I did use a scissors on a few of the “unseen” areas that were cut out to add support and stability. No matter what method you end up using, make sure you take your time with the process. While thicker styrene doesn’t seem to tear easily, thinner sheets may not be as forgiving to quick, impatient cuts.
Basic shapes are very easy to create using styrene. When cutting, make sure you have a metal ruler or metal straight edge to place your blade against. This helps ensure you’ll stay on-track and will also prevent inadvertent gouges in a wooden or plastic straight edge. Another must is clearly marking the areas that you plan to cut. If you plan on making any bends or molding the styrene, make sure you mark those areas as well, but use a different color, thickness, or line variation to avoid confusion.
The exterior armor panels pieces that I created didn’t require much work beyond cutting some assorted-angles and sanding to remove burrs and other blemishes. The interior of the BatBomber is another story. I have gone back-and-forth (and back again) in my plans to create a custom interior that wouldn’t be excessively complex, but would also fit the visual goals that I had set in place for this build. To accomplish most of the interior style that I had sketched out, I needed to bend the styrene to allow the new interior pieces to fit snug within the somewhat tight space of the RR10 Bomber’s interior.
Bending and Forming Styrene
As with cutting this material, there are a few routes that you can take to bend and form styrene. There are items to note with each one, and you’ll need to keep a close eye on the material, no matter what procedure you decide to follow.
- Boiling - Heat up a pot of water until it is boiling and dip the styrene into it. Depending on the size of your material or the specific piece that you’re working on, it should take 20-30 seconds to sufficiently heat and make the styrene malleable. This time will vary based on the thickness and overall size of the material that you are heating up.
- Baking - Similar to the boiling approach, this method will heat the entire piece or sheet of material, allowing you to form it without much strain. Safety note; You’ll want to make sure you have enough ventilation in the area that you’re baking the material, in the event of fumes. Heat your oven up to 175 degrees and place your styrene into the oven. This method works best for larger sheets and pieces of material. The time needed to properly heat the styrene is, ultimately, based on the size of the piece. If you’re forming the styrene over a mold, you can place the material over the mold prior to placing it into the oven. When the styrene begins to droop and sag, you can remove it and complete your molding.
- Spot-heating - This is the method that I utilized to form my interior pieces (dashboard and rear brace). By focusing your heat on specific areas of the styrene, you’re able to create bends that won’t affect the overall piece of material, and should give you added control when forming your shape. Personally, I used a heat gun to warm up my material and, when placed in a vice (with flat, un-textured jaws), and found the overall process easy to complete. Other sources of heat that would also work would be a candle, a lighter, or a hairdryer.
When forming the material, you’ll need to make sure you hold it in your final, intended shape for a while, to ensure that the shape will stick. Additionally, no matter what heating method you choose, always pay attention to the material and don’t overheat it.
Putting it All Together
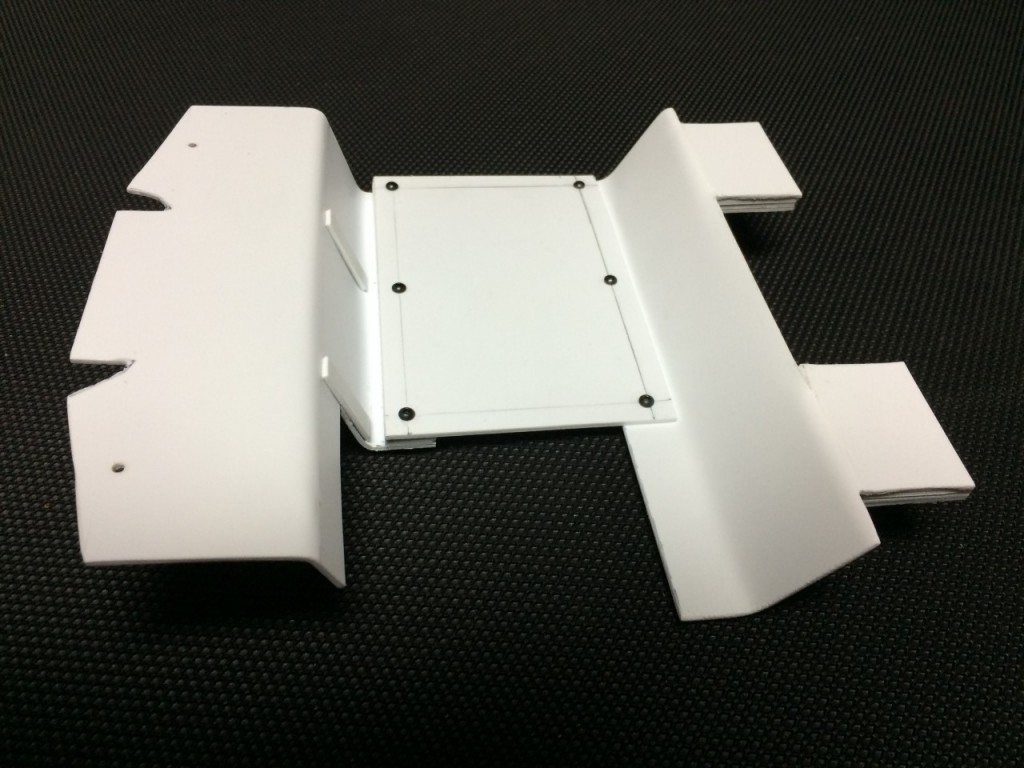
After all Of my cutting, forming, and shaping was complete, I was left with a number of individual parts that looked decent by themselves, but they were destined to be part of something much larger. I created a few additional mounting and brace pieces (also out of styrene) and by layering them and fastening them together with quick-drying glue. There are other adhesives that you can use that will actually weld two pieces of styrene together. Plastruct Plastic Weld is one option that works very well in joining separate pieces of styrene together.
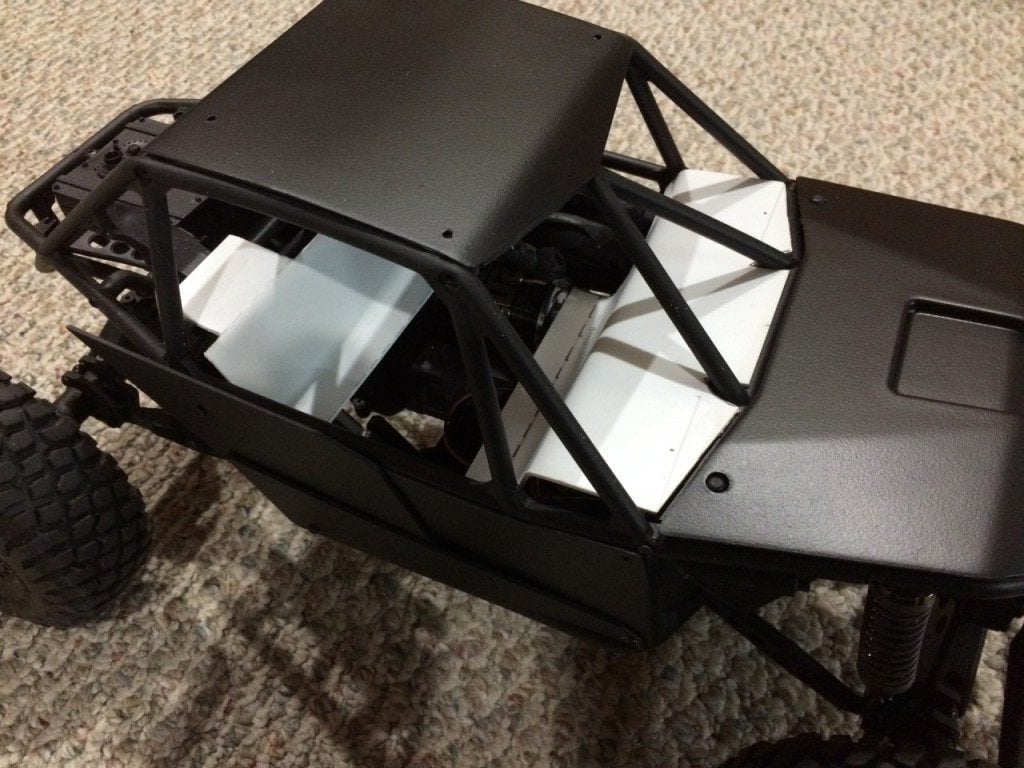
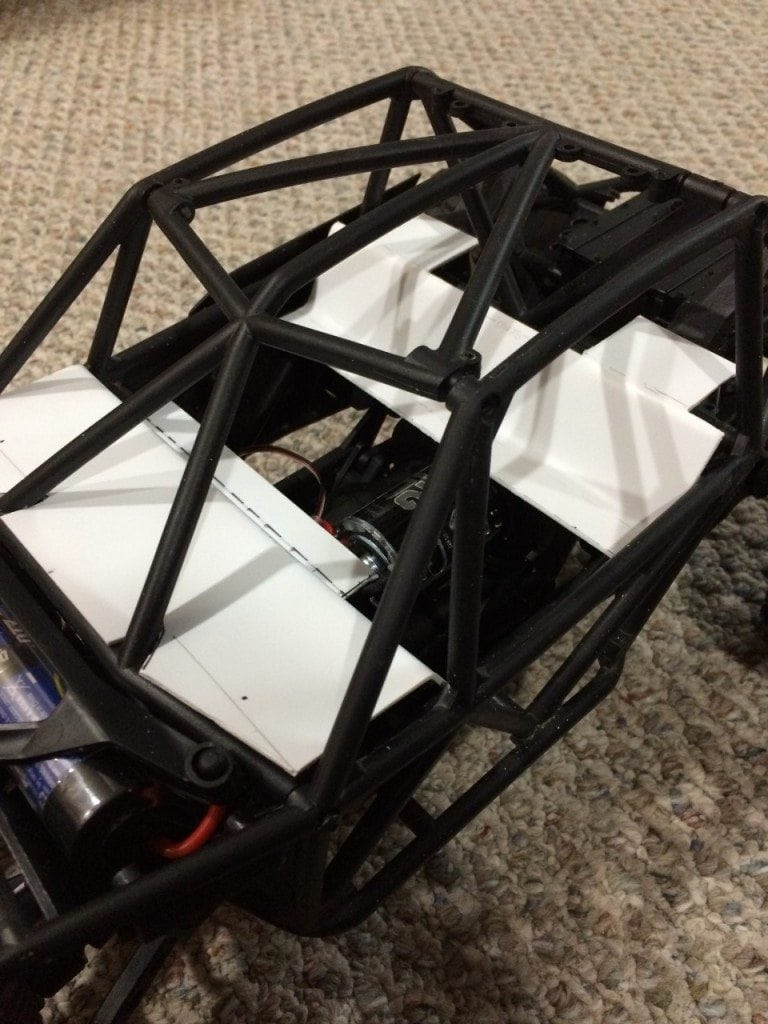
With the small support items created, I re-measured my mounting hole locations and drilled out areas to fasten the new interior to the chassis. As I have mentioned before, the inside of the RR10 Bomber isn’t very spacious, and there was a bit of work needed to maneuver both the stock interior as well as my new interior components into their final places. In the end, I discovered that installing two-thirds of the interior first, and then installing the final, rear item made the most sense and would create the least amount of headache.
Using two lengths of M2.6 screws (10mm length AXA0424 & 6mm length AXA0422), to join the individual pieces to one-another, I quickly had my interior form completed.
As an option for building and forming custom parts and pieces for R/C vehicles, I am very pleased with how my first experience with styrene turned out. If you’re looking to build your own custom parts and pieces, this is a worthwhile material to explore.


