
Pro-Line Pro-Fusion SC 4x4 Build - Chassis Assembly
As soon as I opened up the box containing my Pro-Line Pro-Fusion SC 4x4, I knew I was in for a great time. Sifting through the bags of parts, all labeled and ready to rip open, I gained an immediate sense of the level of quality and craftsmanship that went into the design of this model.
Although it’s been a few years since I’ve driven an R/C short course truck, I started getting the urge to dive back in, and the Pro-Fusion seemed like a great kit to get me back in the game. Here are my thoughts on the build process, right up to the point of selecting and installing the electronics. And before I begin, thanks to the folks at Pro-Line for setting me up with a majority of the materials for this build.
What You’ll Need to Build a Pro-Line Pro-Fusion SC 4x4
- 1 Pro-Line PRO-Fusion SC 4x4 Kit - $299.99
- 1 Set of hex-head drivers (1mm - 2.5mm)
- 1 2.4GHz radio system (receiver and transmitter)
- 1 540/550-size motor (brushless or brushed)
- 1 ESC (compatible with your motor)
- 1 Short course truck or monster truck body
- 1 Set of short course truck or monster truck wheels/tires
- 1 (or more) Cans of polycarbonate R/C body paint
Assembling the Chassis of Pro-Line’s PRO-Fusion SC 4x4
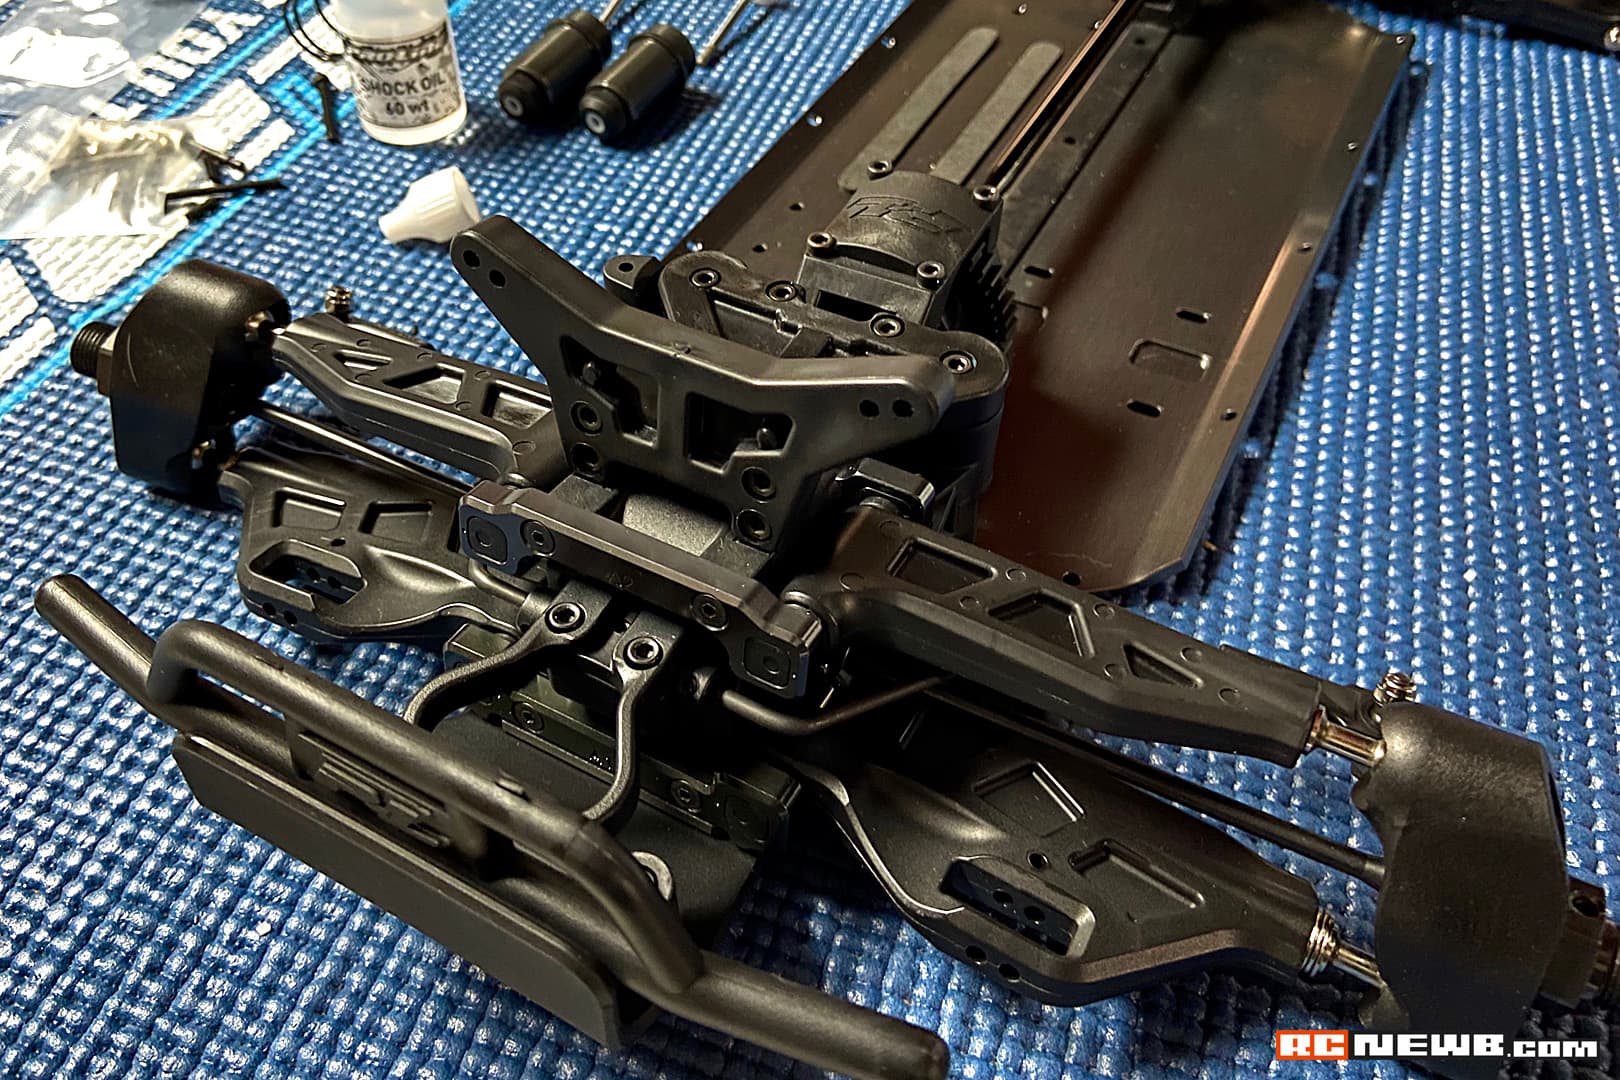
While Pro-Line is well-known for its aftermarket bodies, wheels, tires, and accessories, they’re kit and roller options are a bit of a hidden gem. The Pro-Fusion kit has everything you’d want from a premium-level kit; a durable aluminum chassis, thick suspension elements, and heavy-duty driveline components. Even in the individual bags, you can tell that this vehicle is a beast.
The building process for this model starts up much like any other R/C kit. An assortment of bags, all marked with a specific letter that corresponds to a specific point in the instruction manual. So far, so good. Compared to other kits that I’ve assembled, I’d rank Pro-Line’s assembly instructions and parts bag setup near the top of my list in terms of understandability. The entire booklet contains 19 pages of instructions with 49 steps from start to finish. While this may not seem like much, you’ll want to make sure you have some time set aside before you dive in.
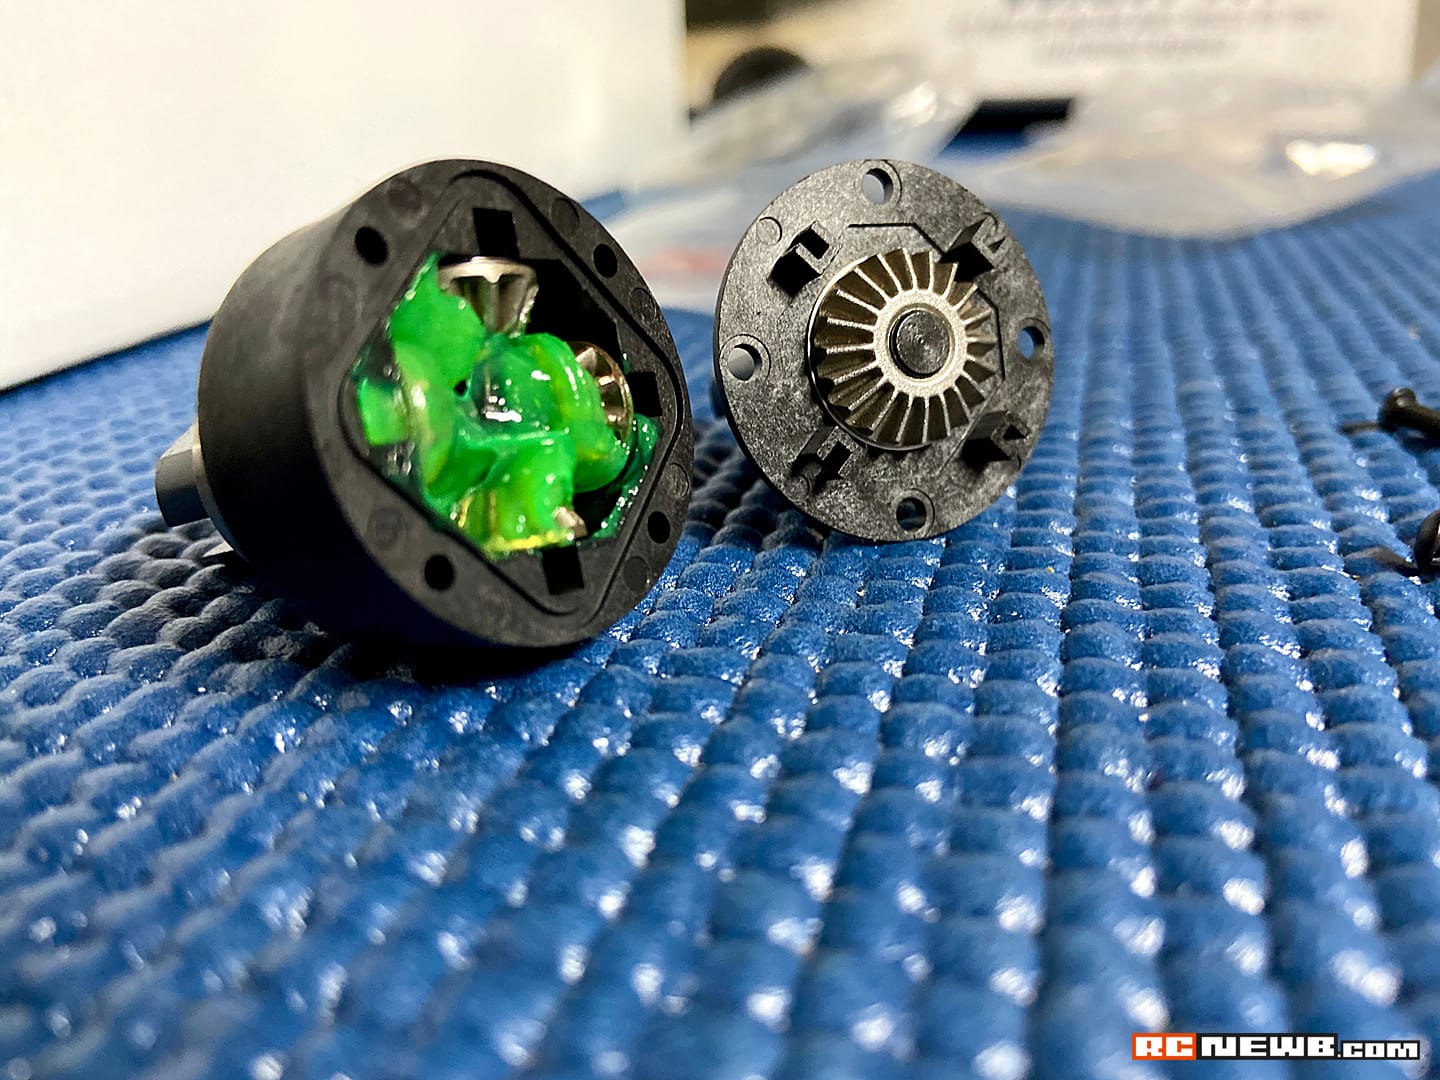
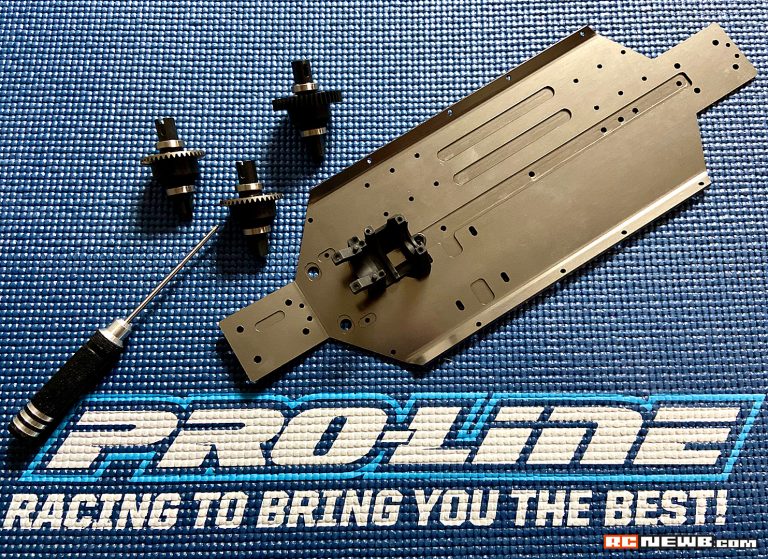
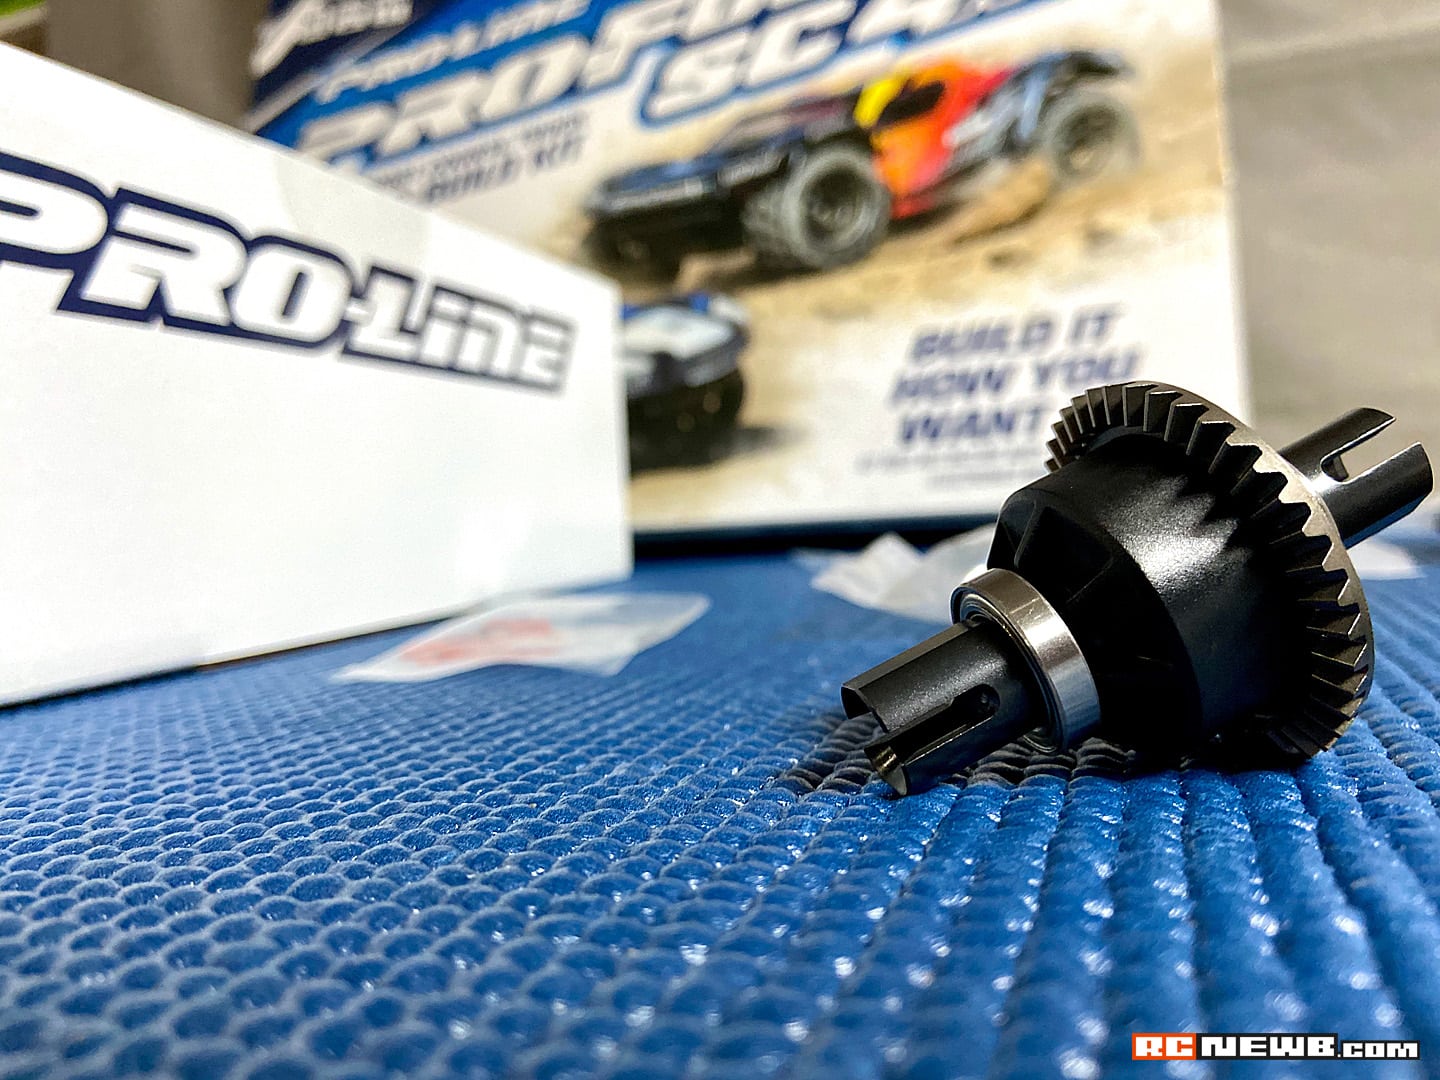
Bag A - Differential Assembly
The Pro-Fusion SC 4x4 assembly process kicks off with the assembly of the front, center, and rear differentials. Truth be told, this is always an area of any build that makes me anxious, mainly due to how crucial the gearing and driveline components are to any radio-controlled vehicle. After taking my time with the first diff, I soon had all three assembled and ready to install.
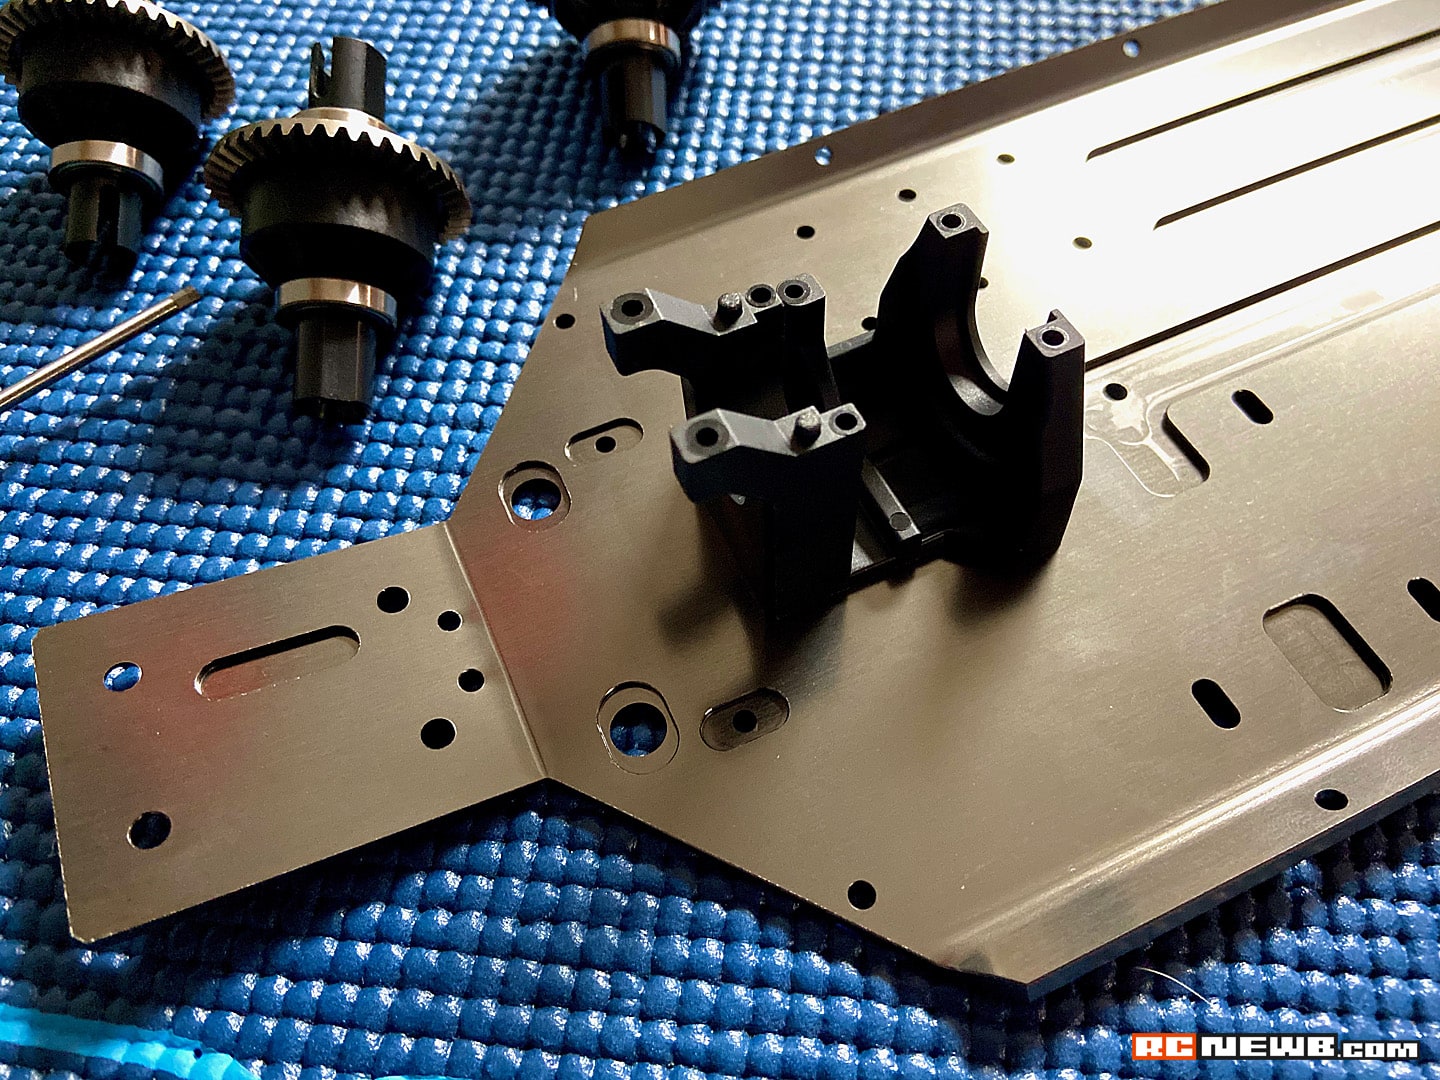
Bag B - Front Differential Case
Moving onto the second bag in the group, it was time to get the front differential situated onto the chassis. Along with this task, I also built the front suspension arms and set them aside for mounting. This bag is a relatively quick one to work through, but as I’ve written in past kit reviews, be patient and read through the instructions carefully.
Bag C - Front Axle, Hub & Pivot Ball Assembly
At this point in the building process, the Pro-Fusion SC begins to take shape. While not connected, the process of building the front axle and suspension components got my excitement flowing. As with the steps before it, this process was straightforward and easy to accomplish.
Pay close attention to what hardware is used in certain areas. Later in the build process, I discovered that I had incorrectly used a screw in the axle assembly and needed to perform some minor surgery to swap it out with the correct hardware. Onto the next bag!
Bag D - Steering Rack & Front Clip Installation
With only a few steps to complete for this bag, I quickly found the front clip and suspension components installed onto the Pro-Fusion’s chassis plate. Each step in the “bag D” process went as planned paving the way for the next set of goodies to assemble.
Bag E - Rear Differential Case & Rear Clip Installation
On the opposite end of the chassis, I found myself following many of the same steps from the front suspension installation on the backside of the Pro-Fusion. The items that seemed to take the most focus (and time) were the rear suspension arms and the rear axle and hub assembly.
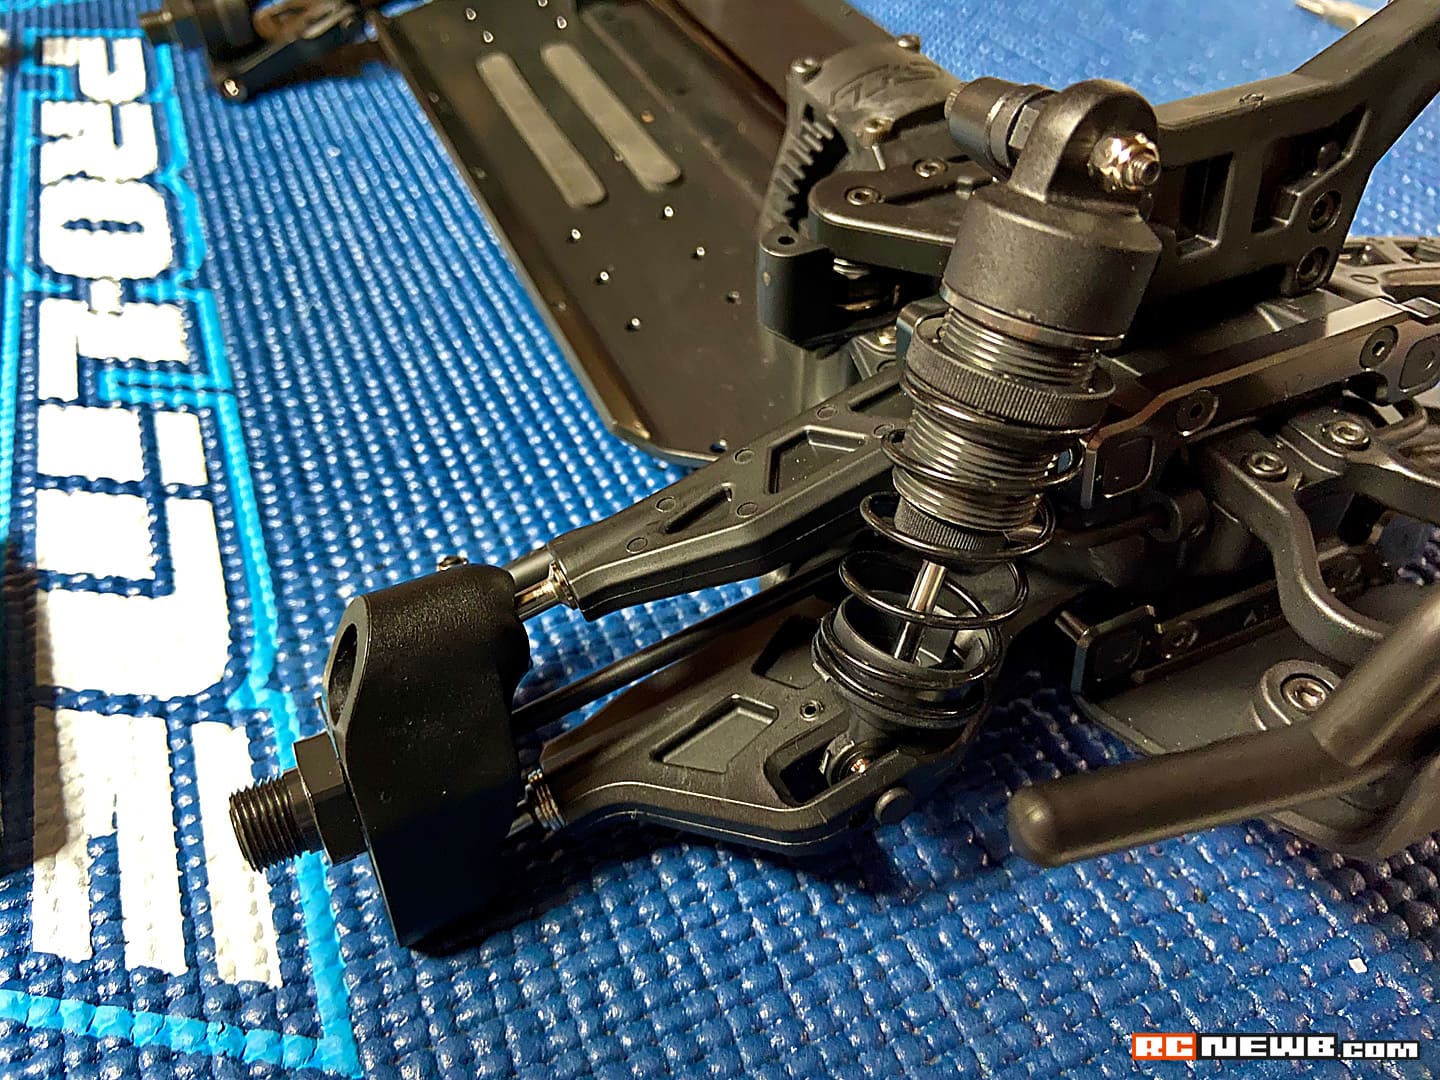
Bag F - Front & Rear Sway Bar Installation
Swaybars are simple, right? These relatively basic components threw me for a bit of a loop, at least when it came to installing them. Assembling the sway bars themselves went as smooth as can be. Placing the sway bars into the front and rear of the chassis had some moments of delay, as the hardware wouldn’t quite line up as it should.
In the end, everything worked out, but again, I’d preach patience. During this portion of the install, I also added the front and rear bumpers to the chassis. At this point, I had bonafide short course truck chassis sitting on my workbench.
Bag G - Shock Assembly & Installation
Throughout my R/C career, I’ve had the pleasure of installing a variety of shock sets. Building them piece-by-piece, however, was a new leg in my journey. Thankfully, Pro-Line laid out the shock assembly steps in a very easy-to-follow manner.
Every internal bit, from the lock nuts to the bottoms of the shock bodies went together beautifully. Before long, I was squeeze-testing each shock and prepping them for installation. A small bottle of 60-weight shock oil is included in the kit, but if you’d prefer to run another weight, you’ll have to supply that yourself.
Bag H - Body Mount and Battery Stop & Strap Assembly
Depending on the body that you’re planning to run on the Pro-Fusion SC, the included body mounts should do the trick. For this build, I have chosen Pro-Line’s 1984 Dodge Ram Race Truck Body, which requires Pro-Line’s Extended Body Mount Set.
Throughout this entire process, I’ve taken note of the superior fit and finish of every component that went into this short course truck kit, and the body mounts were no exception. With their screw-on design, they should provide a little more security for the body compared to traditional body clips.
The battery straps were also installed during this step of the assembly process and allowed me to determine the size of my battery tray. Since I’ll be running standard-size NiMh packs (for now), I have a rather large area for the battery to nestle into. However, if you run “shorty” packs or want to shift your battery weight around, you have opportunities to do that as well.
Up Next: Selecting the Electronics
With 95% of the Pro-Fusion assembled, it’s time to take a short break and figure out what electronics I’m going to run in this beast. So far, I can’t say how happy I am with how this truck has turned out.
The clear instructions and incredible quality of the materials have made this entire process a true joy. Check out the next installment of this build series as I outline the steering servo, radio system, ESC, and motor selection for my Pro-Fusion SC 4x4 project.
Pro-Line Pro-Fusion SC 4x4 Assembly Slideshow


