
Building Carisma's M40S Touring Car Kit - Body Painting & Detailing
As I look at the calendar, it seemed like only yesterday when I put the finishing touches on my Carisma M40S kit build. But between waiting for warmer weather and wrapping up a few other projects, we’re almost six months away from when I turned the final screw into my on-road build. That can only mean one thing; it’s time to paint.
Every new R/C painting project opens up a new world of possibilities, both in color choice as well as design. The M40S comes equipped with a realistic decal sheet that is great if you want to recreate one of the 2014 DTM season racers that these models are based on, but what if you want to put your own spin on this track-ready machine?
Rather than sticking with the real-world design, I decided to strike out on my own and picked my own custom colors for this lid. With plans in place, it was time to bust out the rattle cans and get to work.

Picking Out Paint
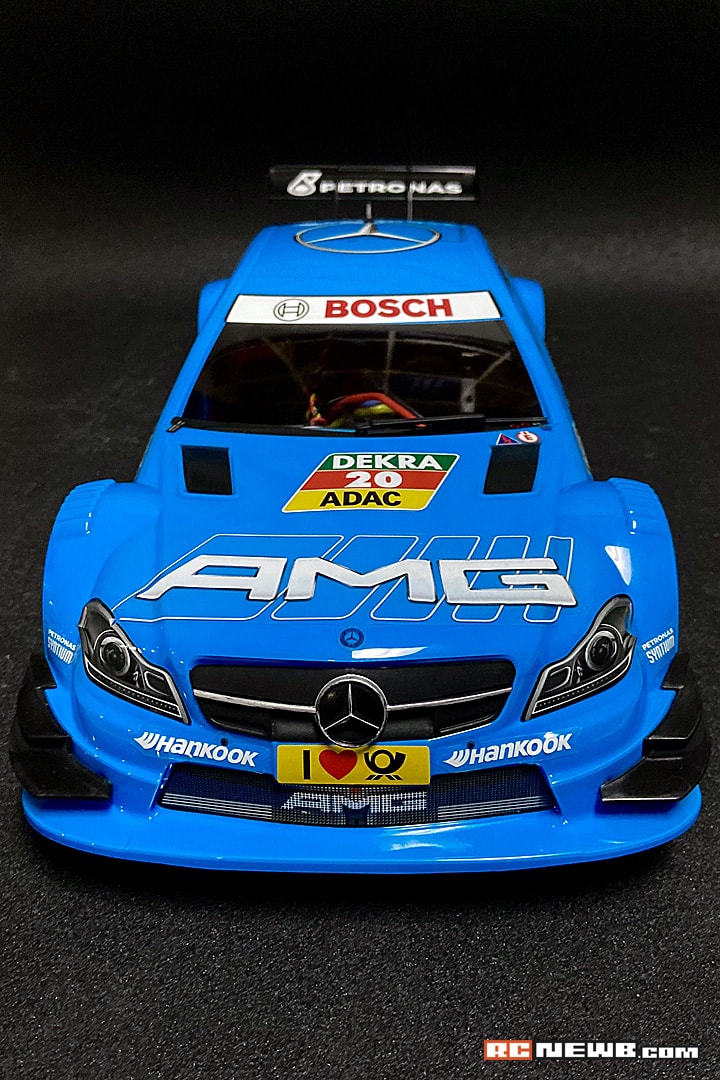
The M40S was not only the third R/C painting project that I had on my to-do list, but it was also the one that I had the least planned for. Of course, I could have gone the standard route of mimicking the replica paint job that was displayed on the box, however, I wanted to do my own thing with this build, and chose a color combo of Tamiya PS3 Light Blue and Tamiya PS63 Bright Gunmetal.
I had a basic, angled stripe design in mind which worked well with the sharp lines of the car body, so with that, I washed the body and got it prepped for painting. Before you take the cap off of any rattle can, it’s always a good idea to wash out your polycarbonate body with a little soapy water. This can help remove any residue from release agents that were used when the body was formed.
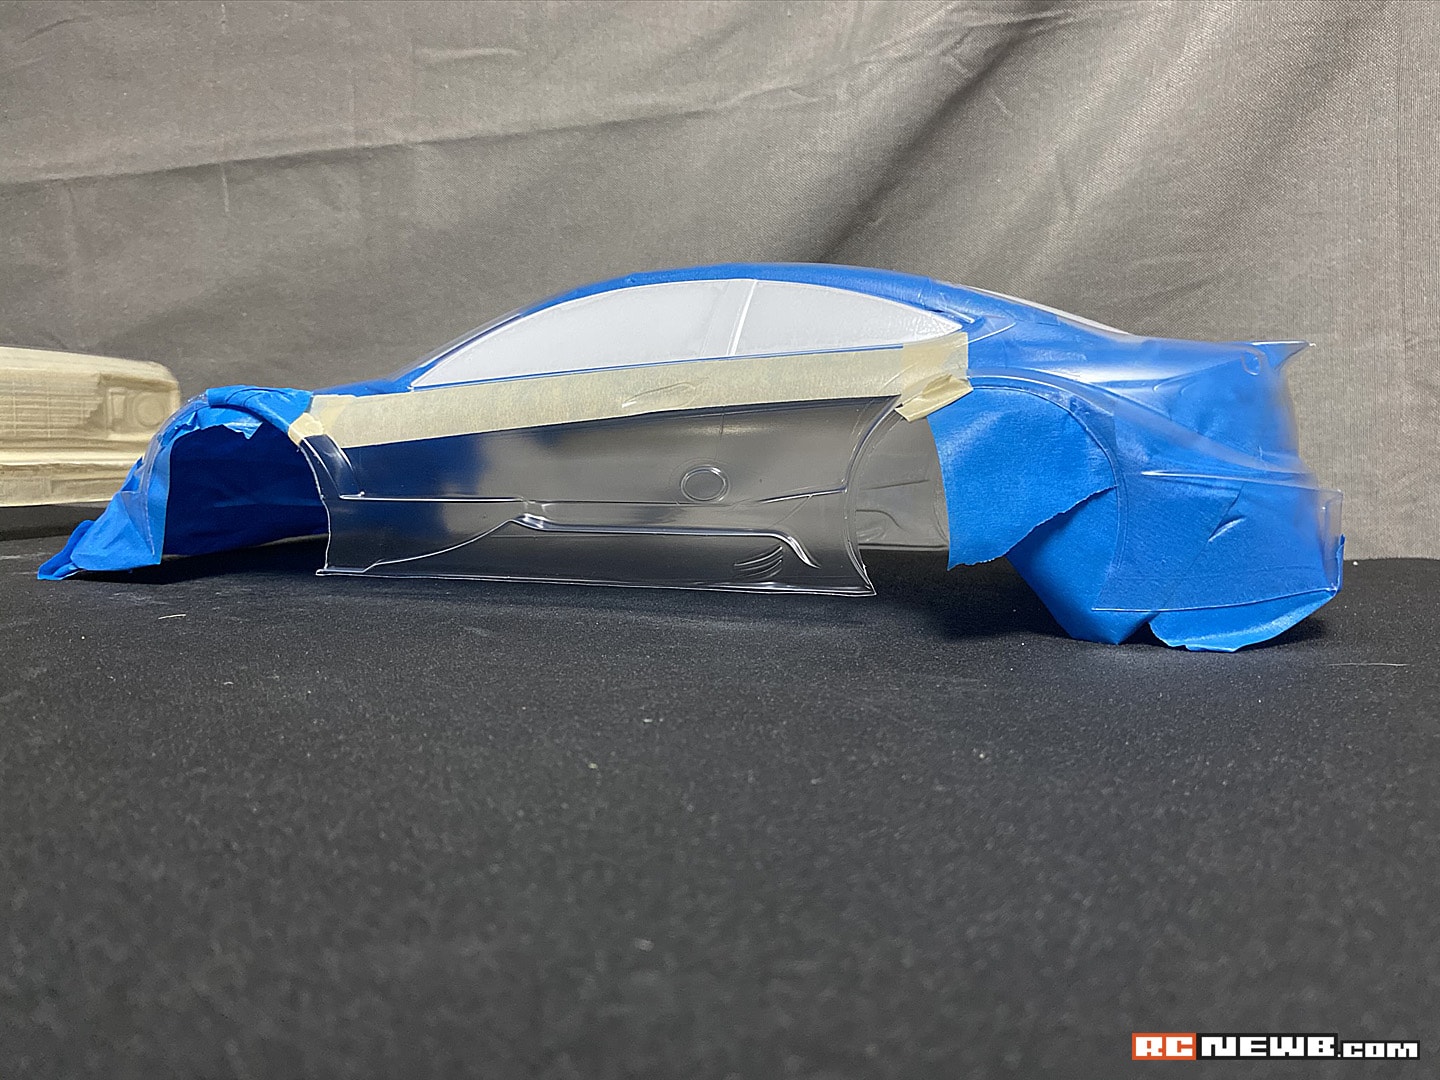
After giving the body a scrub, I started to mask off the areas of the body that I didn’t want to apply paint to. The color scheme was going to primarily be gunmetal gray with blue sides, so most of the car was covered in tape to start off the spraying process.
Applying the First Coat(s)
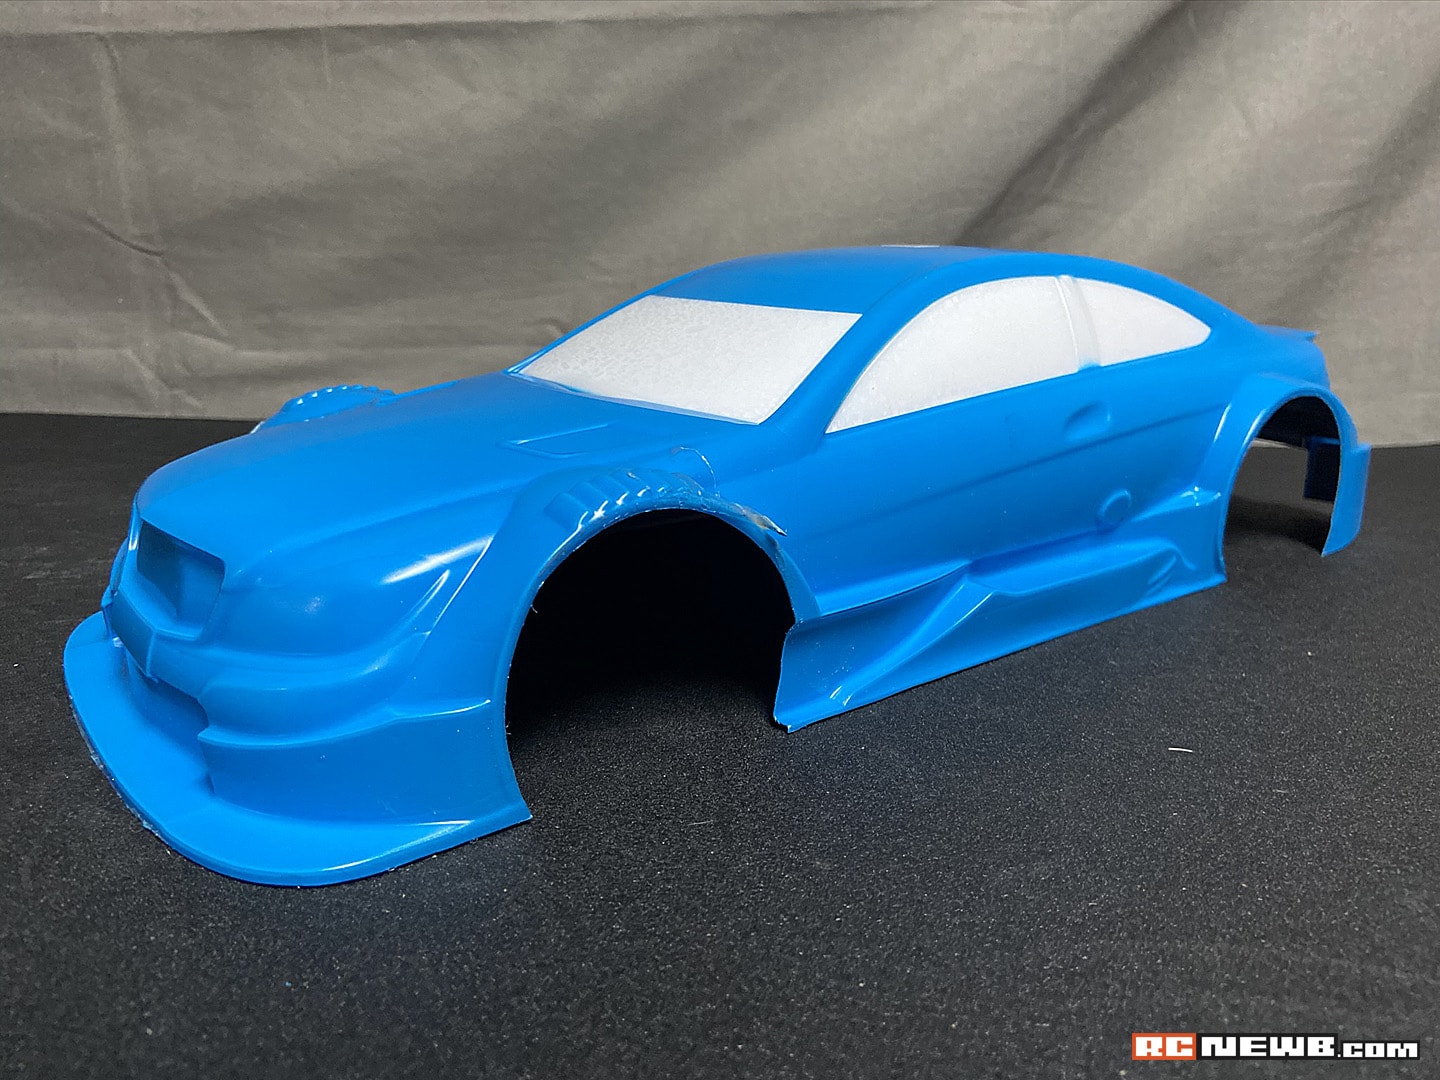
When painting a polycarbonate body, you don’t want to get the job done with the first coat. Applying a faint first layer of paint is usually the best approach as it helps prevent the paint from pooling and running. In total, I think I applied 4-5 coats of color to get the level of coverage that I wanted.
After that, I applied 2-3 coats of Tamiya PS41 Bright Silver Metallic to give the blue paint a brighter, deeper look. Once the backing paint had dried, I removed the masking tape and geared up to apply the final coats of Bright Gunmetal.
When Plans Go Awry
As I peeled back the strips of tape, I started to notice a few light “clouds” of bright blue overspray on areas of the body that should have been masked. At first, I thought that these may have been on the outside of the shell, specifically on the overspray film, however, I soon discovered that they were on the inside of the body, right where I had planned to apply gray/silver. This was a problem.
After a few rounds of profanities and some failed attempts to remove the overspray, I changed course with my painting plans and covered the rest of the body in bright blue. While this squashed my plans for what I felt to be a great color combination, it made the most sense at the time.
With the rest of the paint and backing layers applied, I removed the window masks and started eyeing up the decal sheet and body accessories.
Beauty in the Details
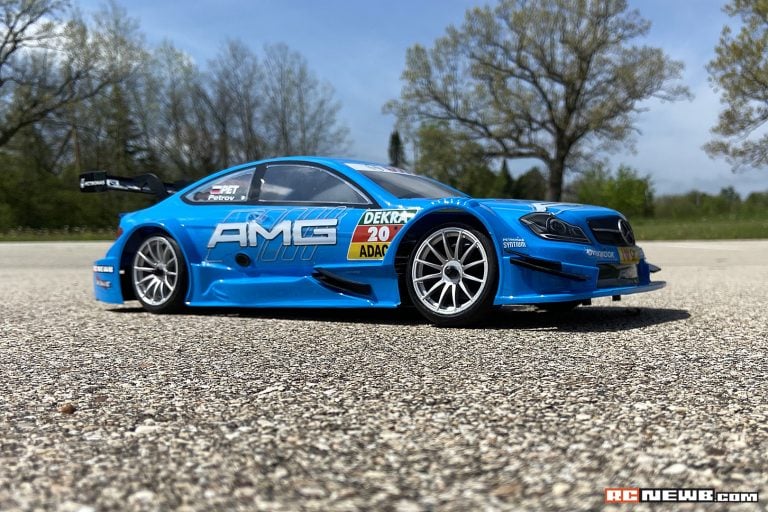
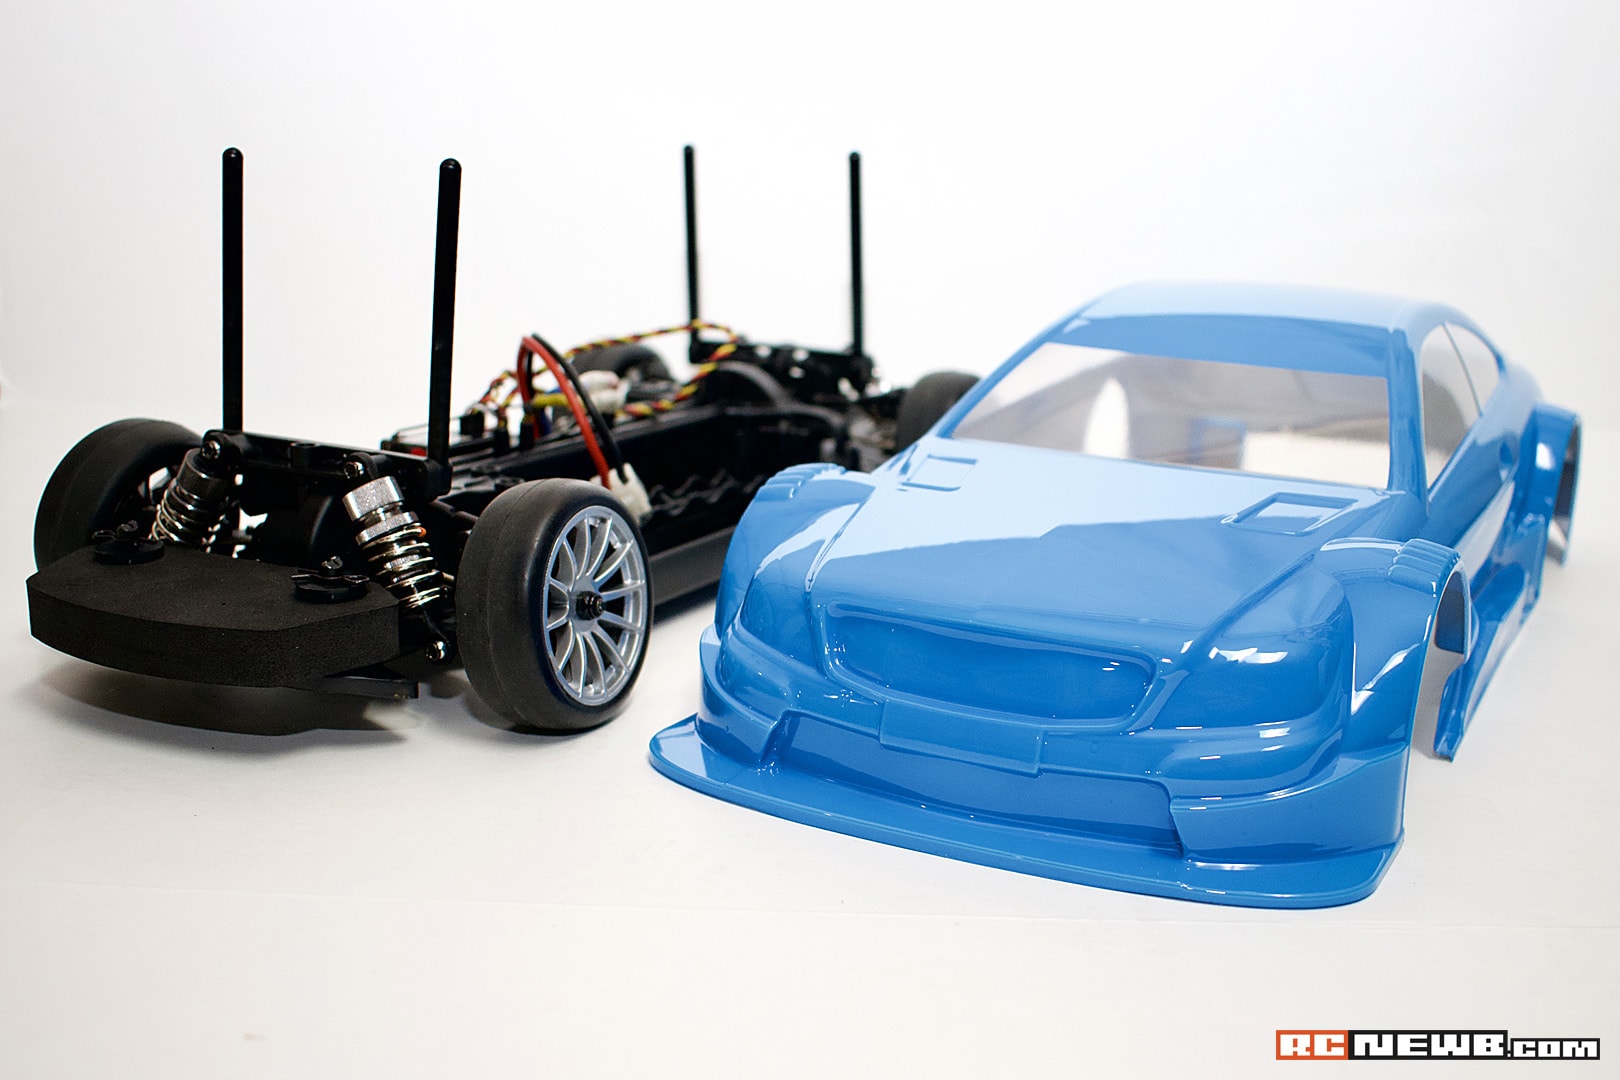
I’ve spent much of this recap talking about the paint and painting process, yet I haven’t really gotten into the beauty that is the M40S Mercedes-Benz body. For my money, Carisma makes some of the most beautiful and most-detailed bodies for on-road R/C models. From recreating the lines of automotive classics, to including scale details and body accessories, Carisma’s attention to detail is second to none. That can put quite a bit of pressure on the hobbyist to not mess things up.
The M40S body detailing process is incredibly involved, however, the end result is well worth the effort. With the painting process in the rearview mirror, turned my attention to plotting out installation points for the many accessories that needed to be applied.
To fully recreate a DTM racer, you have the option to install a number of elements ranging from side mirrors to aero winglets. I selected a few of these items for my build, choosing to not go all-out (fearing they will eventually get lost or fall off), but I always have the option to add them on in the future.
Installing these items was, much to my delight, a pain-free process. Using my body reamer, I was able to quickly make the holes needed to fit the assortment of accessories, get them installed, and move onto decals.
Sticker Shock
Having an all-blue car wasn’t what I had originally planned, and I wasn’t sure that the variety of decals included in the kit would look as good as first thought. However, those fears quickly went away as I began to apply decals. I appreciated that the M40S decal sheets were pre-cut, shaving off time during the detailing process.
All of the decals went on flawlessly, save for a few issues with the headlights. The curvature of the body and the shape of the headlight decals proved to be tricky, and I have a few too many creases in those stickers. That said, the rest of the car looks amazing, with the blue paint complimenting the variety of colors that are on the decals.
All Wrapped Up and Ready to Roll
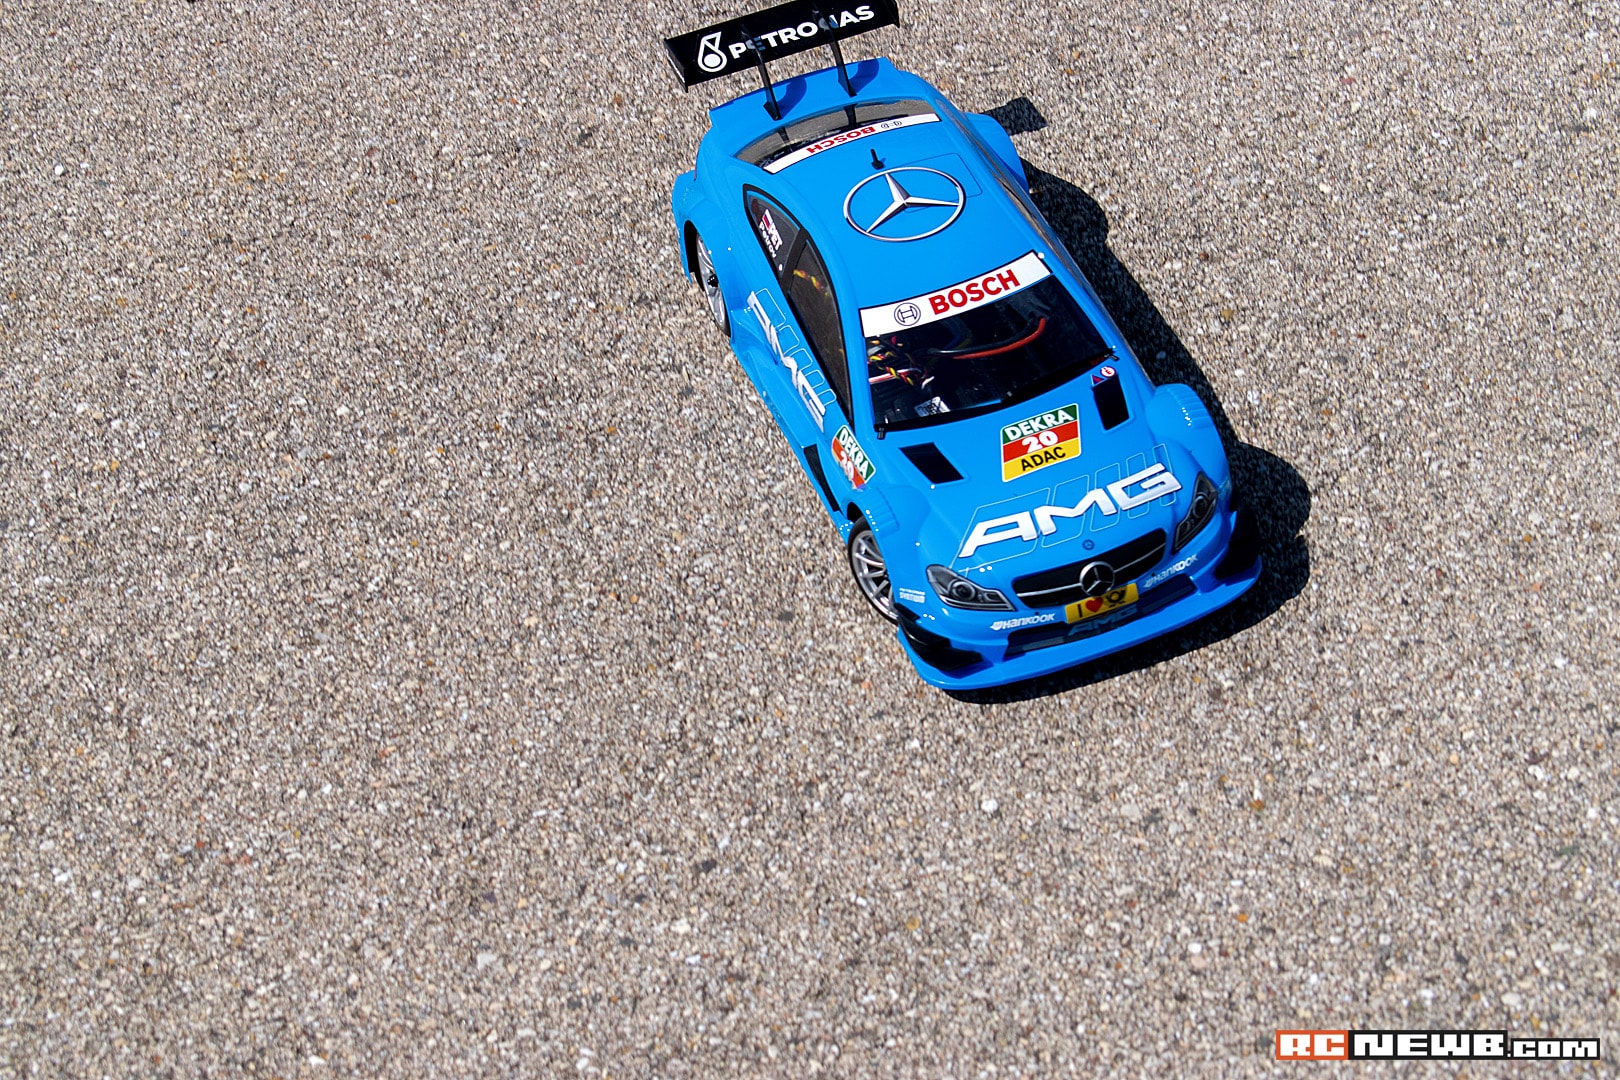
With body accents in place and decals applied, I started to eyeball the mounting situation for this lid. I had originally installed four standard body posts but as the body setup process went on, I discovered Carisma had cleverly included hidden body mounts and posts within some of their accent pieces. I was relieved to not have to punch additional holes in this body and was especially thrilled that I didn’t jump the gun and add holes earlier in the build process.
Now that the body is buttoned up, it’s time to take the M40S to the track (or nearest parking lot) to see what it can do. This project has certainly had its share of challenges, however, seeing this car ready to roll has made the journey worth it.


