
How to create an R/C budget basher body for under $40
 The R/C hobby is an expensive one to get involved in. You can spend a few hundred dollars on a stock vehicle and few hundred more on hop-ups and performance parts. What if you want to customize your body to something that's more you? That can cost a bit of money as well. Bodies range from $20-$60 depending on the scale, model, and source that you buy from and paint, paint can get pricy when you need multiple coats from small cans. I wanted to take a break from shock rebuilds and setup changes so I decided to create a custom body for my Slash 4x4.
The first thought was to go the traditional route and buy a body from my LHS as well as paint and other materials. After pricing things out, I thought there could be a less-expensive way to get a similar result. I wasn't looking to build a shelf queen, just something that I could tear around with and not feel bad about getting a few scratches on it…or worse. That said, pouring a lot of money into something that's destined to get busted up doesn't make much sense to me, especially if no performance gain can be derived. After I checked out pricing of a "traditional" radio-controlled body customization, the breakdown looked like this:
Body: (Pro-line Ford Raptor) $36.51
Paint: (Two cans of red paint, one can of white) $5.99 per can x 3
Pinstripe Tape: (Various widths) $2.95 x 2
ESTIMATED TOTAL COST: $54.39
After that price set in, I began researching ways to create a budget basher body. After searching through forums, browsing through a few online shops, and making a quick run to Wal-Mart, I had my plans set. I had to make a few concessions to keep prices down, but felt comfortable in the quality of the finished product. Here's the breakdown:
Body: (Stock Traxxas Slash) $22.28
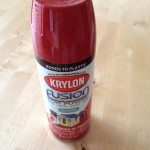
Paint: (Krylon Fusion Red Pepper & Krylon Fusion Flat White) $4.95 per can x 2
Pinstripe Tape: (Various widths) $2.95 x 2
ACTUAL TOTAL COST: $38.08 (a savings of $16.31)
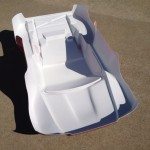
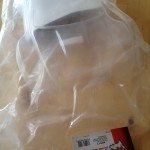
 Instead of creating a customized Raptor, I bought a stock Traxxas Slash body. Not only was the cost low, but it was pre-cut so the only things I needed to do were prep and paint it. Time to start the experiment.
For my paint choice, I opted to go with Krylon Fusion. I've never used this paint before this project and with it, came a few unknowns. The biggest questionmark hovered around whether or not the paint would adhere to the body and how it would stand up to impact and through nature of bashing. That said, it was time to take the plunge.
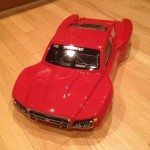
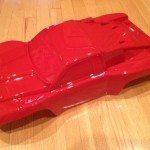
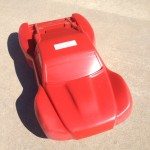
In total, I applied at least 5 coats of red paint to the body before the look was no longer was transparent. Two more coats did the trick to make the finish complete. Since I was using a larger can of paint, I was left with enough paint to do two to three more coats, if I wanted to.
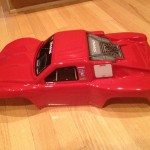
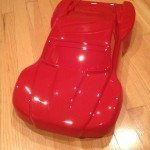
 I then sprayed four coats of white paint as a backing. After that set, it was time to peel off the protective outer film and see how it looked. From a little sneak peek after peeling back some of the film, I was quite pleased with the result. Once the entire body was revealed, I was stoked. It was then time to slap on some decals.
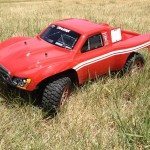
I should mention that my plan wasn't to have a solid red truck. Originally, I was leaning towards a red and white combination until I discovered the right-rear fender had a dent in it. While I didn't want to stick more work into the paint job knowing the body had a blemish, I didn't want to scrap the project either. Since it is a basher body, it's bound to get a few dents and dings along the way.
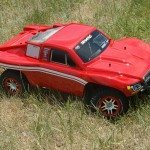
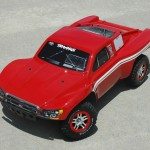
 After the stock decals were applied, I turned to my iPad and began sketching some options for pin striping placement. After I had done three layouts, I wasn't feeling the vibe from any of them, so it was time to do some real-life layout work. Holding the pinstripe tape up to the body, I came up with a simple approach that I liked as soon as I saw it. Applying the pinstripes didn't take long and within a few minutes I was staring at a completed body.
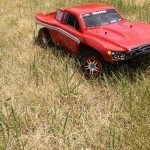
If you're looking to create your own custom R/C body, it is possible to do it at a discount. Feel free to share your creations after they're finished! Check out a full gallery of the budget basher body project:


UPDATE:
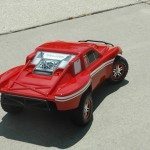
I've not yet run the "red rocket" basher body or done any impact testing. In the initial research that I'd done on the possibility of using Krylon Fusion with Lexan, I didn't see too many downsides mentioned. The folks at Dirt Runner's R/C sent me some interesting, first-hand experience information through Twitter over the weekend.
@RCNEWB unfortunately the Krylon Fusion will chip and delaminate from te lexan. It's Pactra or Faskolor for permanent results.
— DirtRunner's R/C (@dirtrunnersrc) July 9, 2012
@RCNEWB FYI Createx is Faskolor before it gets rebadged and is available at art supply stores MUCH cheaper and even in larger bottles
— DirtRunner's R/C (@dirtrunnersrc) July 9, 2012
@RCNEWB indoor figure 8 with a body I ran out of pactra white on and used Fusion cremated a beautiful Desert Rat body
— DirtRunner's R/C (@dirtrunnersrc) July 9, 2012
@RCNEWB sure. It didn't really cremate the body but if I had patience and got more Pactra it wouldn't be a chipped mess right now.
— DirtRunner's R/C (@dirtrunnersrc) July 9, 2012
First off, thanks to Dirt Runner's R/C for this information. If I'd known this beforehand, I would have taken a different path with my paint selection, but that said, I've not seen any peeling or chipping of the paint up to this point. After I put the body through it's paces I'll post an update on how it's holding up.


